
Blueleaf Billing: Creating and Assigning Fee Schedules
A fee schedule sets the rate you charge on assets. Build one in Fee Schedules in the left side menu, then assign it to a client.
Building a Fee Schedule:
1. Go to Fee Schedules and select the AUM Schedules tab at the top left.
2. Select + New Schedule to create a new fee schedule.

3. Enter a Schedule Name, choose a Type, and add a Description. The types are:
- Flat Percentage: One Annual Rate (%) applied to the whole balance.
- Tiered - Blended: Rate Tiers, each band charged at its own rate.
- Tiered - Flat: Rate Tiers, one rate applied to the whole balance.
Both tiered types show Rate Tiers, marked (Blended) or (Flat). Each row takes a dollar figure to start the band, a dollar figure to end it, and a rate in percent. Leave the end of the top tier empty and it runs to infinity.
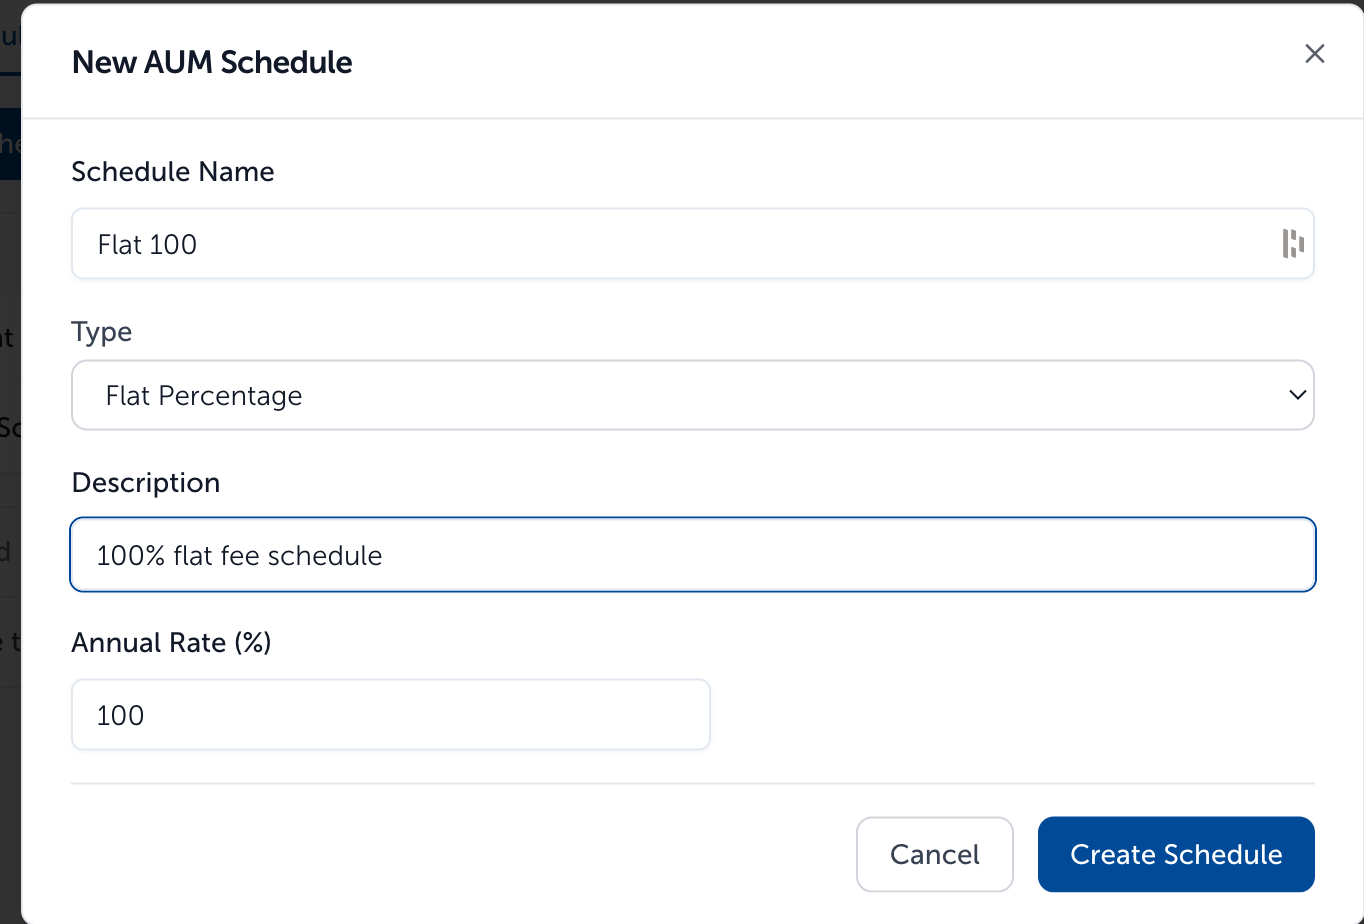
4. Click + Add Tier for another row, or the trashbin icon to remove one.
5. Select Create Schedule to finalize the fee schedule.
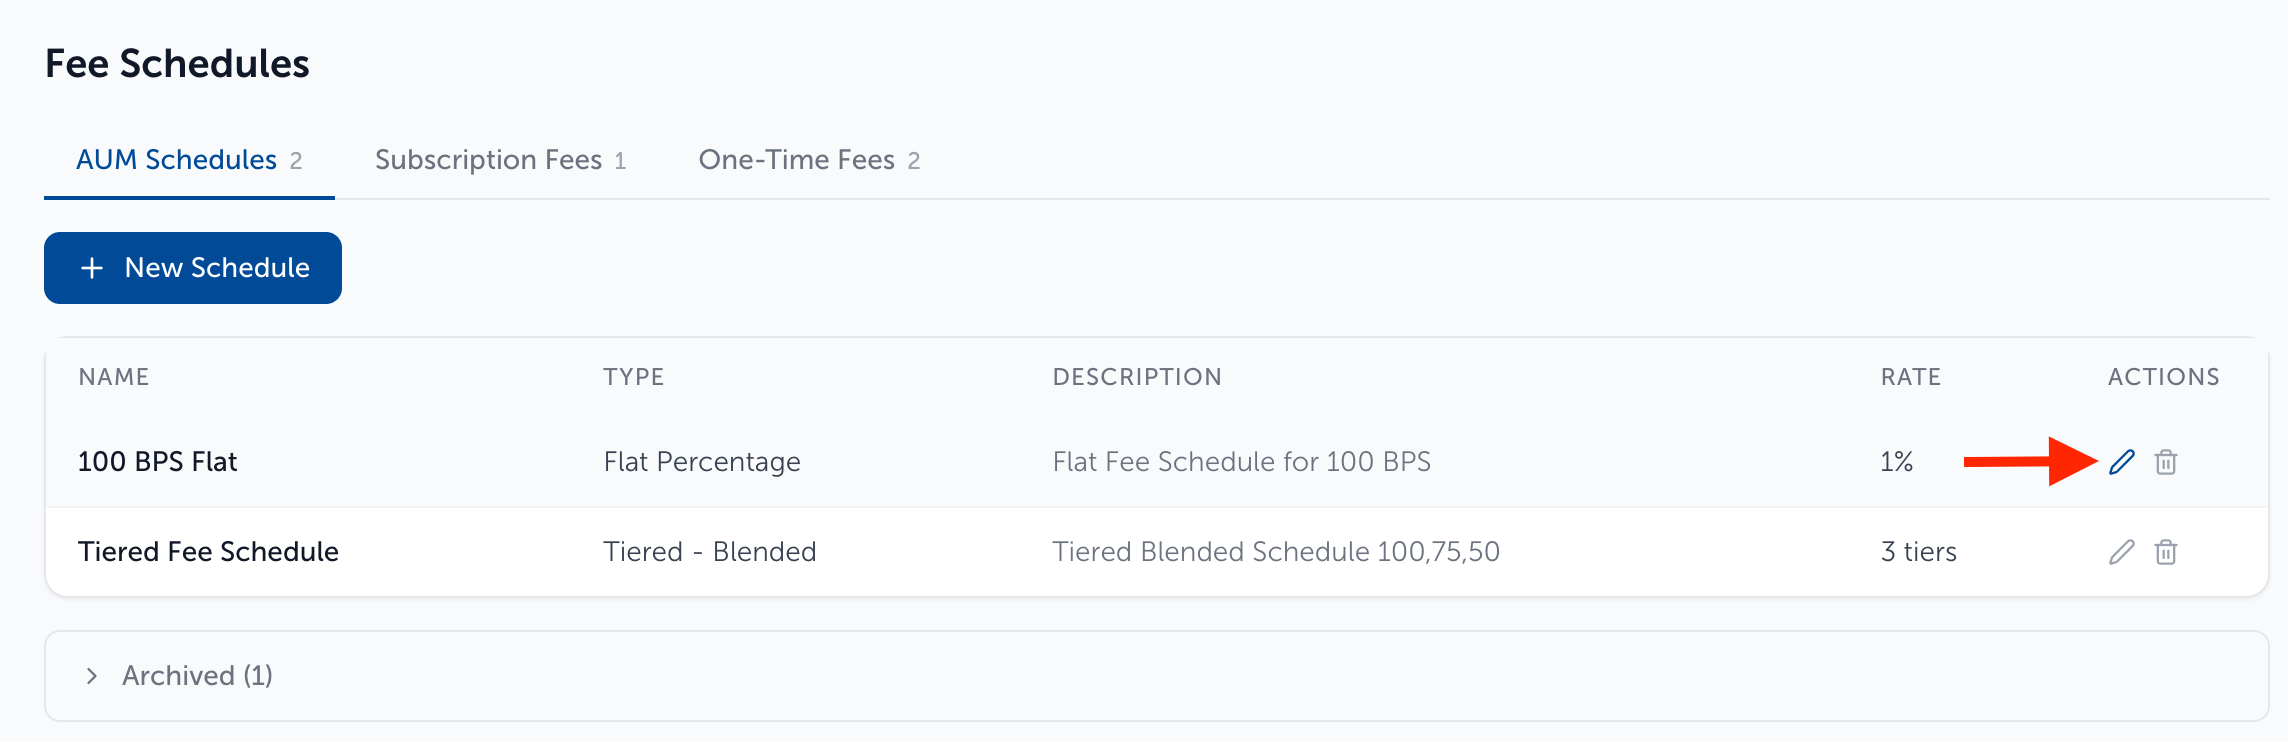
To change an existing fee schedule, click the pencil icon on its row. Once you have made the appropriate changes, select the Update Schedule button.
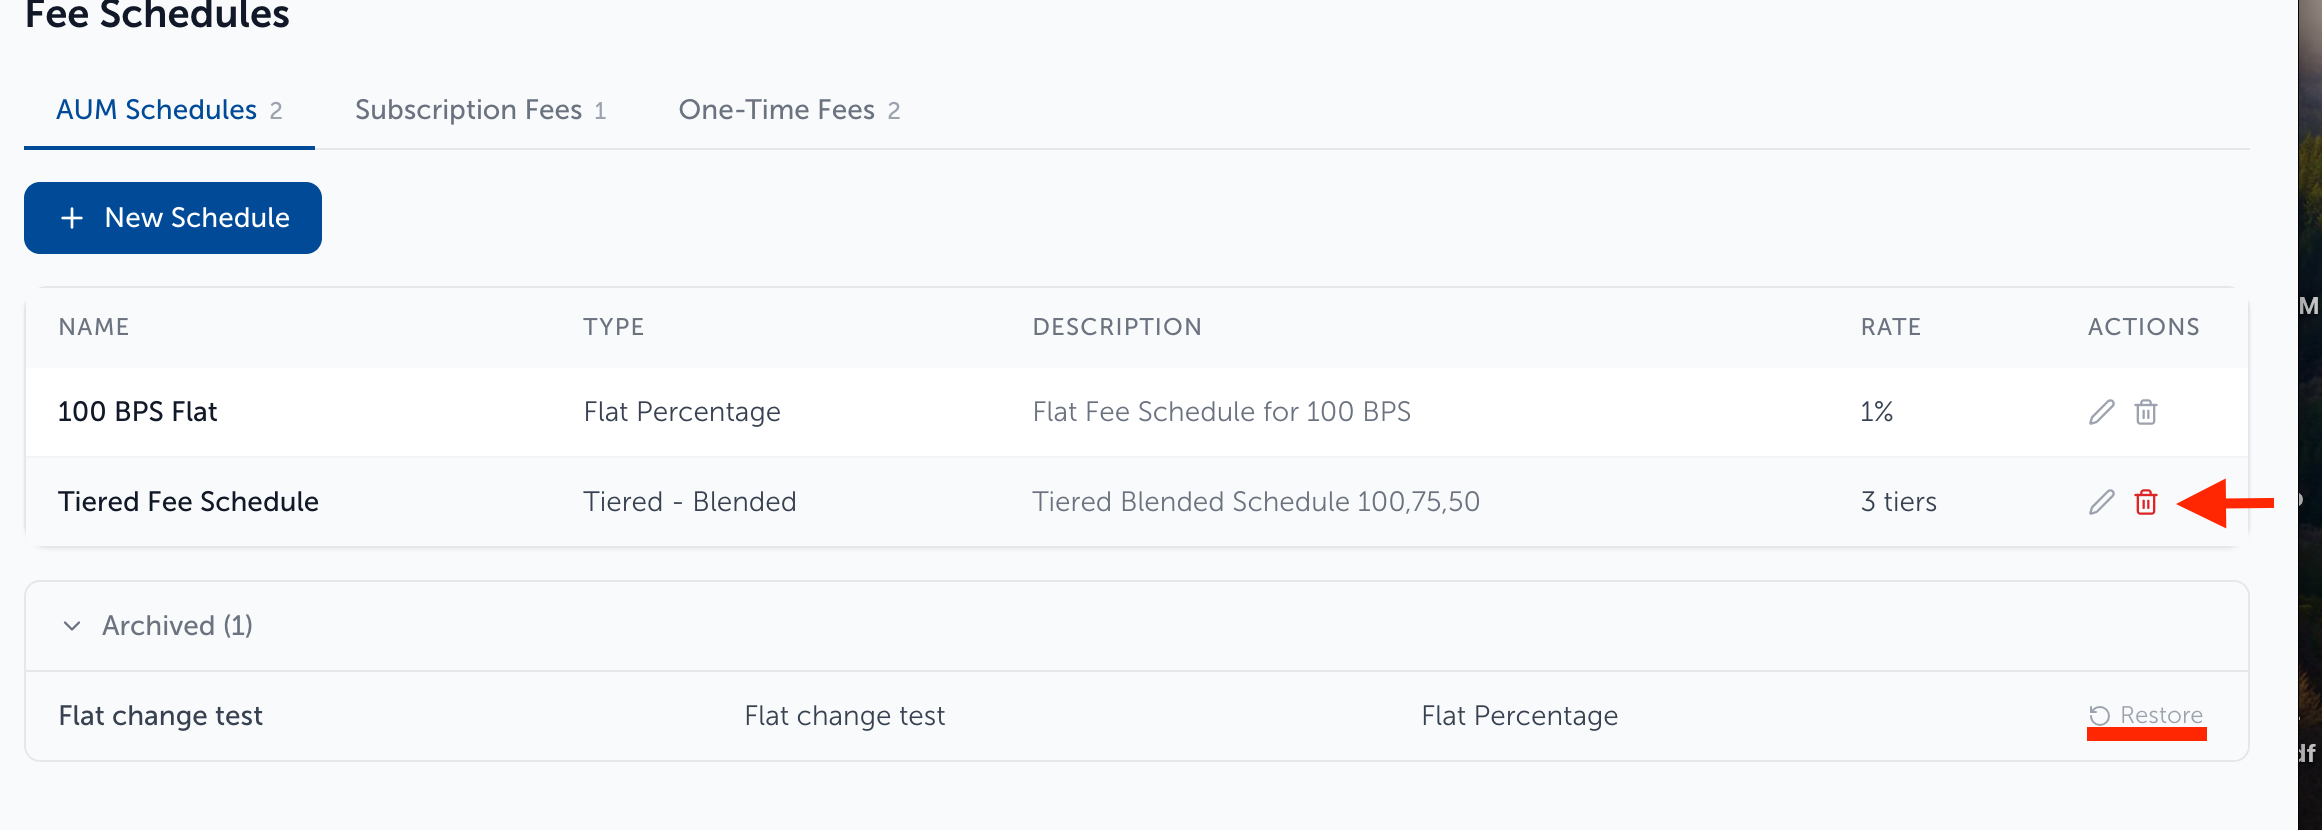
The trashbin icon on a fee schedule row archives it. Archived schedules collapse under Archived at the bottom of the tab, with Restore to bring one back.
Note: You cannot edit the schedule type. If it was created as Flat Percentage it must stay that way. The details within can be changed but not the type. If a new schedule type is needed, it must be created new.
How the two tiered types differ:
Take the tiers in the screenshot (Rates are annual in both cases):
1% to $1,000,000, 0.75% to $3,000,000, 0.5% above that.

- Tiered - Blended splits the balance across the bands. A $2,000,000 account is charged 1% on the first $1,000,000 and 0.75% on the next $1,000,000.
- Tiered - Flat finds the one band the balance falls in and charges that rate on all of it. The same $2,000,000 account is charged 0.75% on the full $2,000,000. A balance sitting exactly on a boundary takes the lower band’s rate.
A billing run records the version of the schedule it billed on. Fee Breakdown shows the schedule as it stood for that run, so editing a schedule does not change a run that was already billed on it.
Assigning Fee Schedules to Clients:
This section covers assigning a fee schedule in Blueleaf Billing. If the client or the account is not listed, add it in Blueleaf first:Assigning Accounts to Households (a.k.a. Clients)
- Go to Clients & Accounts (List View)
- Select the client from the list on the left
- The AUM Schedule dropdown sits on the client card
- Pick a fee schedule from the AUM Schedule drop-down or use the search bar to search for a fee schedule. To remove the fee schedule - choose “— No AUM Schedule —”.
- The selection saves as soon as you select an option.
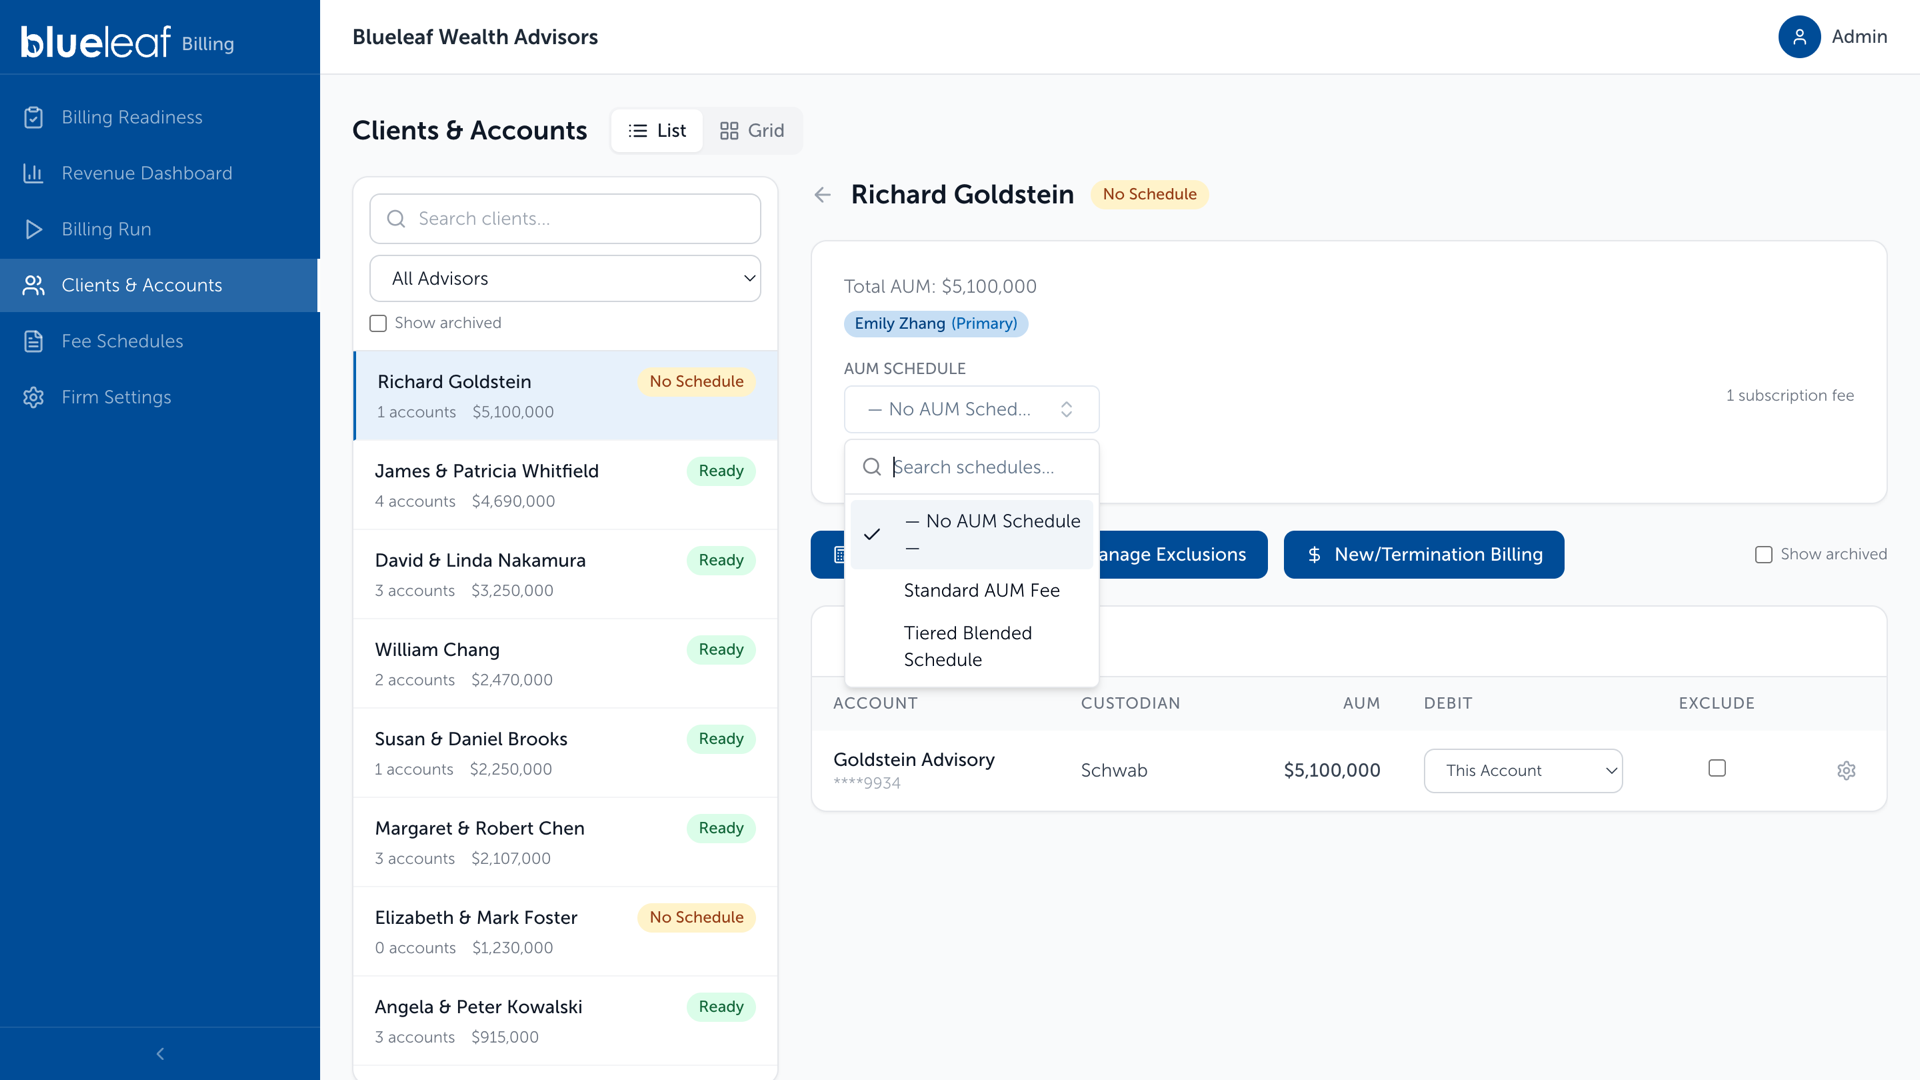
Clients & Accounts, the AUM Schedule dropdown open on a client
Once a fee schedule is set, the details of the fee schedule become visible, so you can check you chose the right one.
Assign Fee Schedules to clients in bulk:
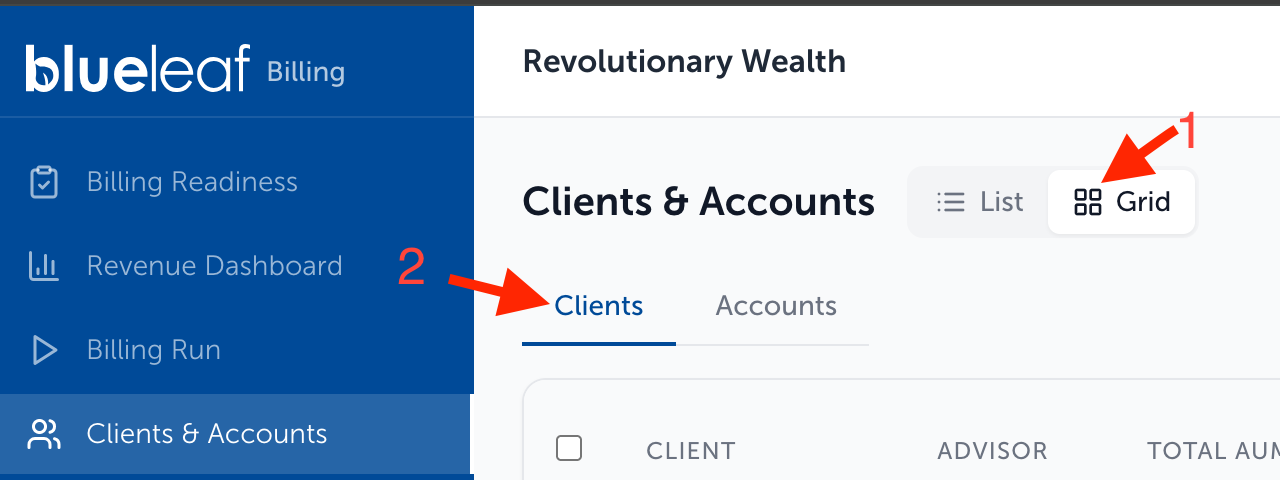
- Go to Clients & Accounts, and select Grid View
- Check that you are on the “Clients” tab
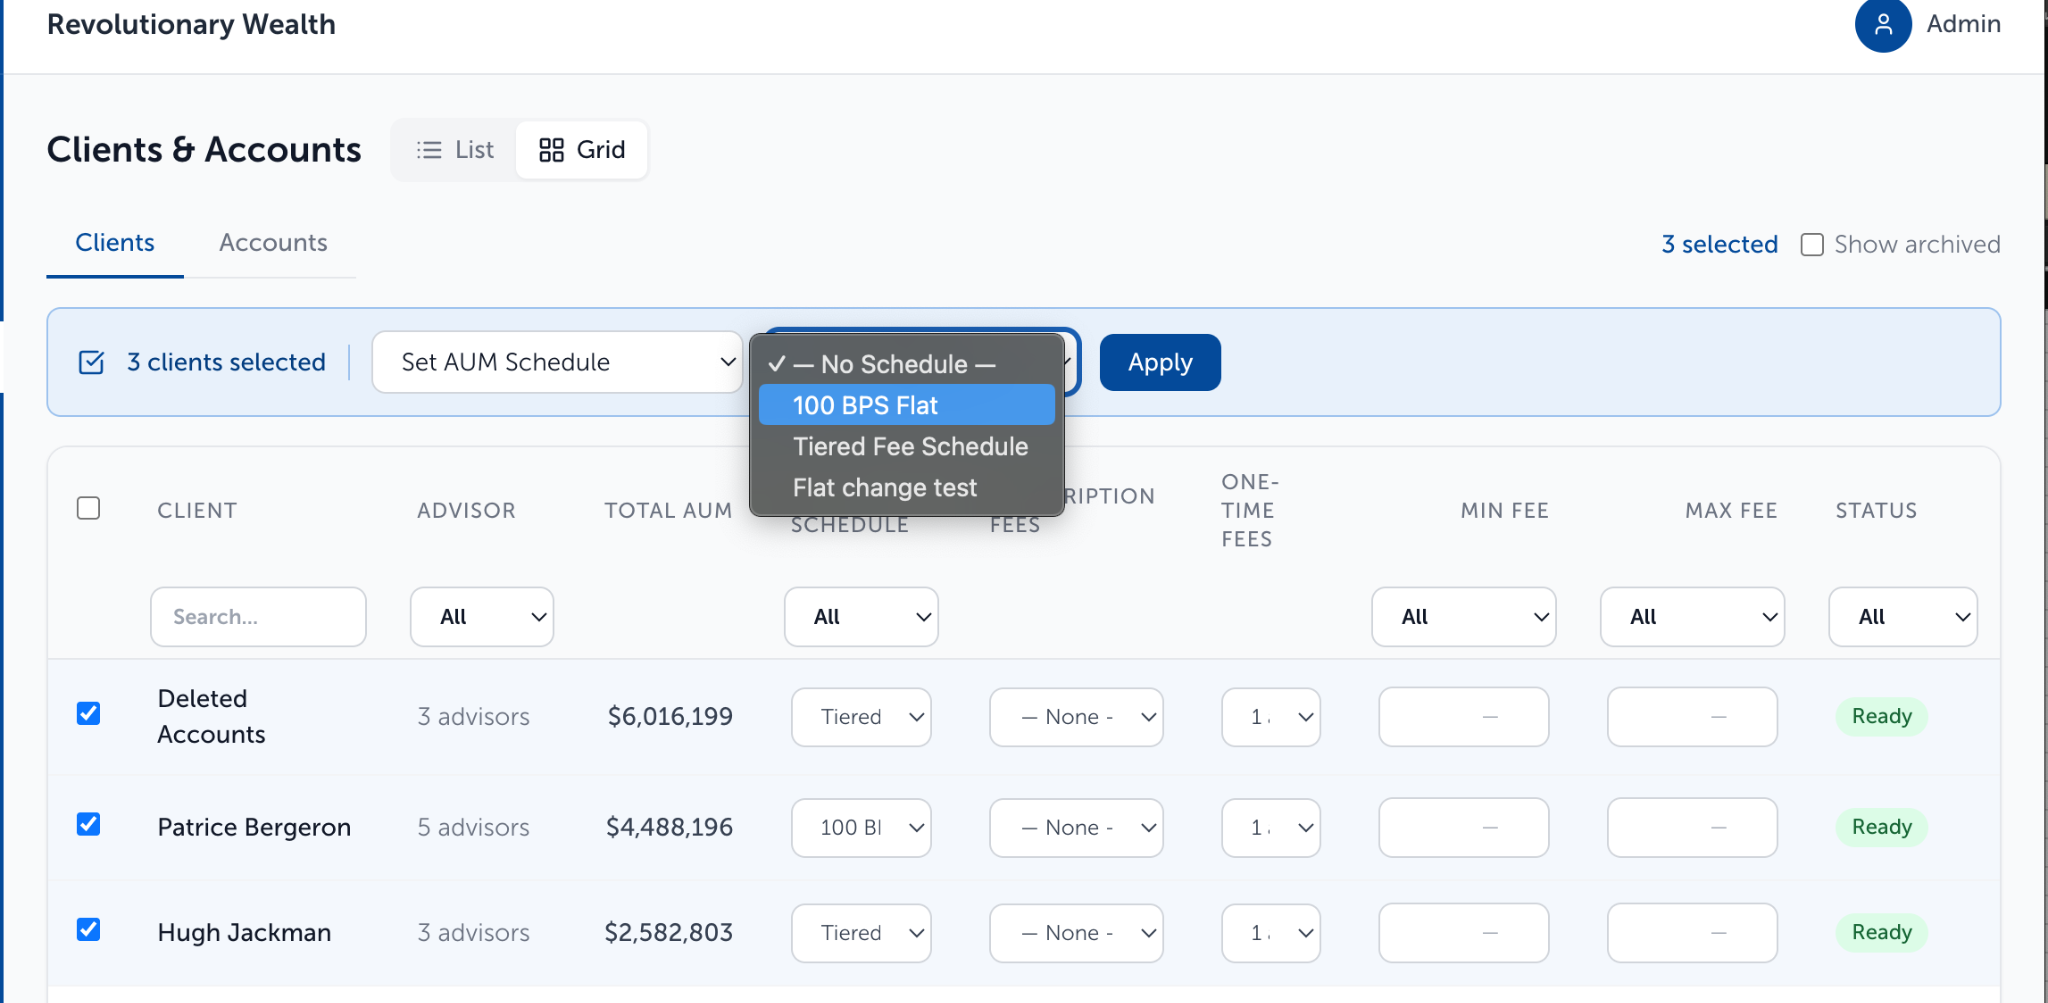
- Select the clients you want to assign fee schedules for
- A bar will appear above the table with a count of what was selected from the drop-down select “Set AUM Schedule”
- Pick the fee schedule you would like to assign then click Apply
Need help? Email vipsupport@blueleaf.com with any billing questions, feedback, or issues.